
Here is where we left off: Nice clean, beautiful white tile and messy, busy, mismatched everything else.

Today I am sharing the simple updates I did before the grand finale. To see part one of this bathroom remodel, go here. To see how to remove old wallpaper borders and update baseboard heaters, read on.*
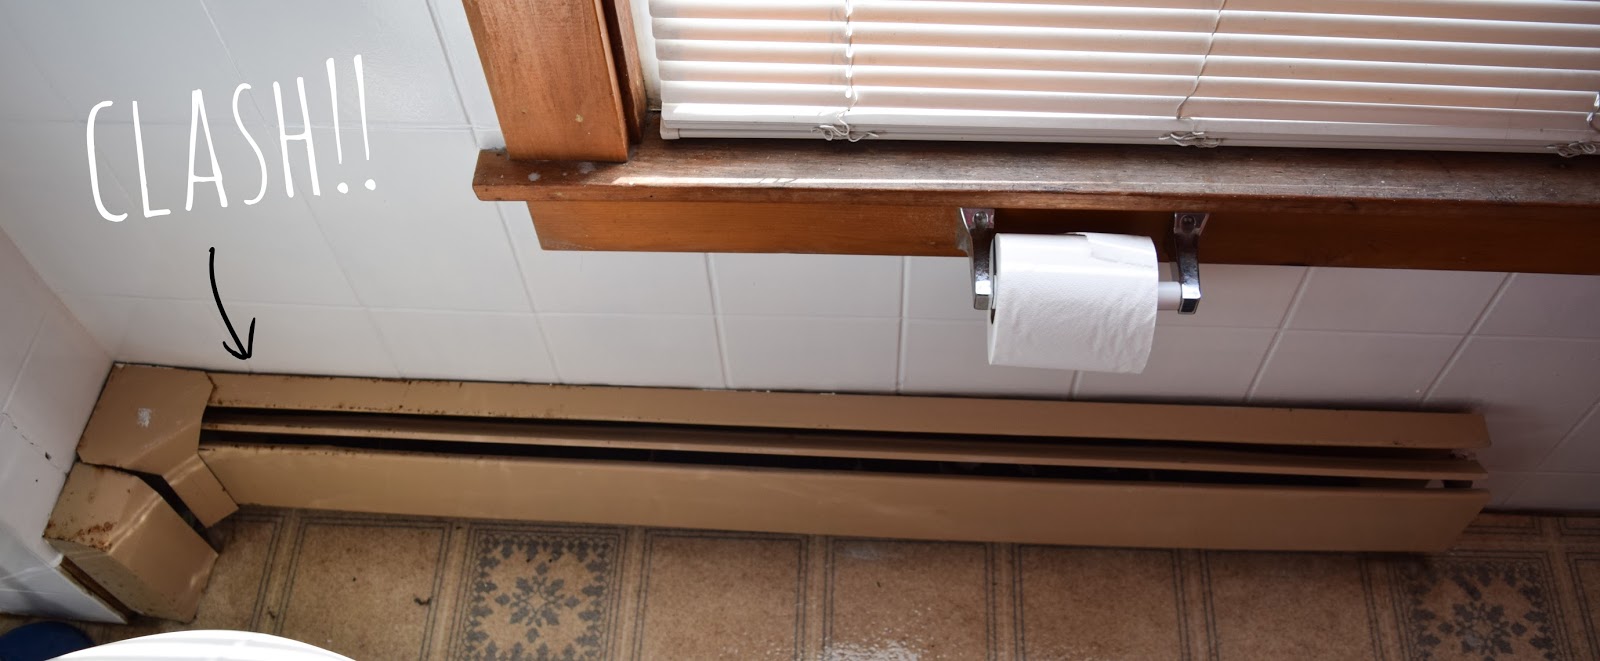
Painting an Old Baseboard Heater
(disclaimer: I did this quickly, not thoroughly. There are other tutorials that talk about how to take apart the heater and disconnect the elements. This is not one of them)The next project I completed was painting the old baseboard heater. It was a little chipped and the paint was rusty in spots. It clearly clashed with the newly painted, fresh walls!
Step 1 - Prep
I started by turning off the heater and allowing it to cool. Then, I opened the windows, turned on the bathroom fan and started another fan in the bathroom to get the air flowing.
Step 2 - Wash the baseboard heater to get rid of dust and grime.
Before I washed the baseboards, I started by using the wand attachment on my vacuum cleaner (on sale right now!) to get off a layer of dust on top of the heater and underneath the heater. Then I washed mine with Comet and my scrub brush from this post, since I had them on hand. Let dry.Step 3 - Sand down entire surface, spending extra time sanding the rusty spots.
I sanded it down with 100-grit sandpaper and then sanded down the especially rough rusty spots with heavier grit sandpaper. After sanding, I wiped the whole thing down with a microfiber cloth.Step 4 - Tape off surrounding areas.
Most tutorials suggest taking apart the baseboard heater and taking it outside to paint. This is probably a better idea, but that's not what I did. Instead, I taped off underneath the baseboard with multiple strips of blue tape side by side and then taped down a piece of cardboard for over spray. Then, I taped off around the edges of the heater where it met the bathroom tile. I left the top open, and simply held a large piece of cardboard back behind the heater as I spray painted the heater.Step 5 - Spray paint the baseboard heater with Rust-Oleum
After it was all taped off, and after making sure that air was flowing through the bathroom, I used the Rust-Oleum High Heat Enamel Spray to spray paint the baseboard heater. It was a quick job, following the directions on the back of the can. Then, I removed the tape and left the house for an hour to let the paint dry and the fumes dissipate. When I got back, the baseboard finally fit the newly updated tiles.
Removing an Old Wallpaper Border
The next task before painting the walls in the bathroom was to remove the old wallpaper banner from the top of the wall. This was really an uncomfortable process but the result looks so much better. It involved a lot of time standing on a ladder and looking and reaching up. Here is the process.
Step 1 - Remove the Top layer of paper
There are many ways to do this first part. You can use a fabric softener solution, a hair dryer, or what I used, a vinegar solution made of 1 part vinegar to 1 part water. This makes the bathroom stinky, but it worked.Since the top layer of the wallpaper is waxy, it was difficult for the vingetar solution to break through the waxy toplayer and get it sufficiently damp. I filled a bowl with the vinegar solution above, climbed on a ladder, and used a sponge to dampen the wallpaper border. Then I let it sit for about 5 minutes. I pried up the edge of the border and started to pull, often having to use the sponge to again dampen the border. The border came off in a few big strips but still left the adhesive behind.

Step 2 - Remove the rest of the Paper/Adhesive
This part of the process gave me a crick in my neck, but by the half-way mark I figured out how to do the job more effectively. You will need your sponge (or a spray bottle) and some kind of plastic scraper.
First, I used my sponge and vinegar solution to wet the adhesive/paper as far as my arm could reach from the spot where my ladder was planted. Then I let it sit for a few minutes before I started to scrape. You can tell when it's ready because the paper itself turns a darker color. When I tried to scrape right away, the solution hadn't completely penetrated the adhesive and I would have to put more muscle into getting the paper to come off bit by bit. After letting it sit a few minutes though, I could take my scraper to the darker paper and when I scraped, it would come off in big, long chunks.
After scraping about half-way down my section, I would then shift the ladder and dampen the rest of the way my arm could reach so that the new section would have a few minutes to get damp before I got to it.
Doing this process, scraping a section of damp paper with my plastic scraper and then wetting the section ahead so that it would be prepared when I got to it, I was able to get the wallpaper completely removed much more quickly.
All that was left was to let it dry, grab a bucket of leftover paint from the basement, and prep and paint the wall. You will have to wait for the next DIY Bathroom post to see the finished look, but just know that it's pretty amazing and all done for under $100!

Make sure to pin this for reference later!
Stay tuned for Part 3 coming up in a few weeks! In the meantime, check out these other great DIY posts (Bathroom Storage / Blanket Scarf / Gold Office Supplies / Necklace Holder / Spray Paint Vases) ! What DIY projects are you working on right now? Let me know in the comments below!
*This post contains affiliate links. Clicking on hyperlinks may result in a commission for More To Mrs. E
No comments:
Post a Comment